Why Build a Home Studio in 2025?
Five years ago, a decent home studio setup could easily run you a few thousand dollars before you even hit record. The landscape has shifted dramatically. In 2025, you can build a genuinely capable recording rig for under $800 that would have sounded like a professional facility a decade ago. Think about artists like Billie Eilish, who recorded “Ocean Eyes” in her brother’s bedroom. Or Steve Lacy, who produced Grammy-winning tracks on his iPhone and a cheap interface. These aren’t exceptions anymore. They’re proof that the barrier to entry is lower than ever.
What changed? Chip shortages stabilized. Budget manufacturers caught up to pro-level specs. Driver technology improved, slashing latency. And the secondhand market became a goldmine. The result is a gear landscape where $100 interfaces perform like $500 models from 2018. But all this choice brings a new problem: analysis paralysis. That’s where this home studio setup guide comes in. We’re cutting through the noise. No fluff, no overhyped gear lists, just practical steps that get you from unboxing to your first clean recording as fast as possible.
Whether you’re a singer-songwriter, a beatmaker, or a podcaster, the core principles are the same. Let’s walk through what you actually need and — more importantly — what you can skip.
The Core Four: Must-Have Gear for Any Home Studio
Ignore any list that tells you to buy a $400 microphone before you have a decent interface or a treated room. That path leads to frustration, not better recordings. There are four pieces of hardware you absolutely need. Everything else is a nice-to-have until you’ve made your first ten recordings.
- Computer: This is the engine. A modern laptop or desktop with a solid processor (Intel i5 or M1/M2 equivalent) and at least 8GB RAM is your starting point. SSD storage is non-negotiable for loading samples and projects quickly. If you already own a capable computer, you’re halfway there.
- Digital Audio Workstation (DAW): Your recording software. This is where you’ll record, edit, mix, and master. Pick one that fits your workflow — more on that below.
- Audio Interface: This translates your analog sound (from microphones, guitars) into a digital signal your computer understands. It also drives your headphones and monitors. Cheap interfaces sound fine, but cheap preamps don’t. Spend a little more here.
- Monitoring System: You need to hear what you’re recording accurately. This means studio headphones (more on why they’re better than gaming headsets) or studio monitors. Do not skip this — your laptop speakers will lie to you.
That’s the foundation. A microphone is technically optional if you only make electronic music, but we’ll cover that separately. Once you have these four, you can record, mix, and finish a track.
Picking Your First Digital Audio Workstation (DAW)
Your DAW is your creative home. Don’t overthink this, but do pick deliberately. Each DAW has a personality, a workflow bias. Here’s a quick breakdown:
- Ableton Live (Suite/Standard): The king of electronic music production and loop-based work. Its session view is unmatched for live arrangement and improvisation. Great for beatmakers, producers, and anyone who likes to experiment. Steep learning curve but incredibly rewarding.
- Logic Pro: Mac-only. The industry standard for singer-songwriters, composers, and podcasters. Great stock plugins, excellent for recording vocals, and the best value for Mac users. If you already have a Mac, this is a no-brainer.
- FL Studio: Legendary for beatmaking and hip-hop production. The pattern-based workflow is intuitive if you think in loops. Lifetime free updates is a killer feature. Not as strong for live recording or mixing workflows.
- Reaper: The underdog. Incredibly cheap ($60 license), ridiculously customizable, and runs on anything. Perfect for podcasters, voiceover artists, and anyone who wants a lean, powerful DAW without bloat. The learning curve is real — you’ll need to set up your own workflow.
- Free Options: Audacity (simple recording/editing), Cakewalk by BandLab (full-featured, Windows-only), and GarageBand (free for Mac, limited but great for learning). Start free if you’re unsure, but commit to a paid DAW once you hit walls.
My advice? Download the trial versions of the DAWs that match your genre. Watch one beginner tutorial for each. The one that feels intuitive — not the most popular — is the one you’ll actually use.
Choosing the Right Audio Interface for Beginners
The interface is your signal chain’s most overlooked component. A bad interface introduces noise, latency, and flat preamps. A good one makes everything else you plug into it sound better. Key specs to look for:
- Inputs: At least two inputs (for stereo recording or dual-mic setups). Single-input interfaces are too limiting. Look for combo jacks that accept both XLR and quarter-inch.
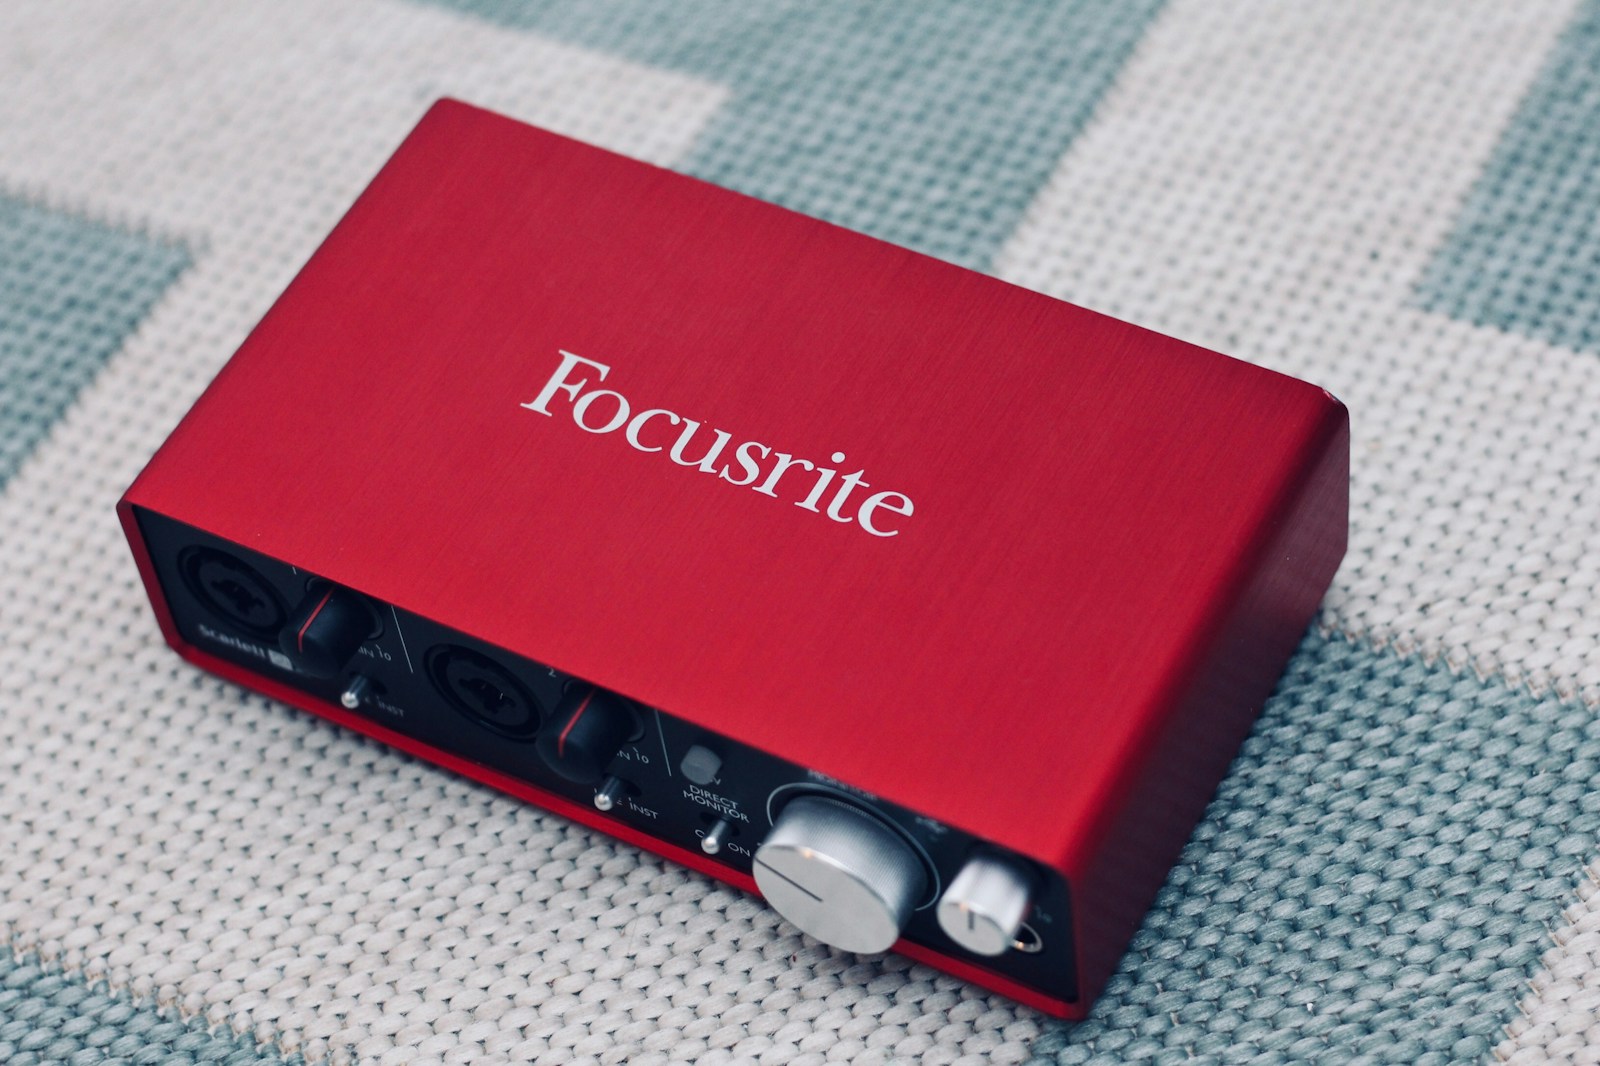
- Preamps: The quality of the preamp determines how clean your signal sounds. Known good beginner preamps come from Focusrite (Scarlett series), Universal Audio (Apollo Solo or Volt series), and Audient (iD4). They’re not flashy, but they work.
- Latency: This is the delay between what you play and what you hear in your headphones. Lower is better. Ensure your interface has dedicated driver support (ASIO for Windows, Core Audio for Mac). Most modern interfaces are fine, but check forums for driver complaints.
- Connectivity: USB-C is standard now. Avoid anything relying on outdated USB types unless you have compatible ports. Thunderbolt is overkill for beginners.
If I had to recommend one for absolute beginners: the Focusrite Scarlett 2i2. It’s the Honda Civic of audio interfaces — reliable, affordable, and does exactly what it needs to do. The Universal Audio Volt 2 is a step up in preamp character if you can stretch the budget. Don’t overthink this one. Pick a trusted brand, buy from a retailer with a good return policy, and focus on making music.
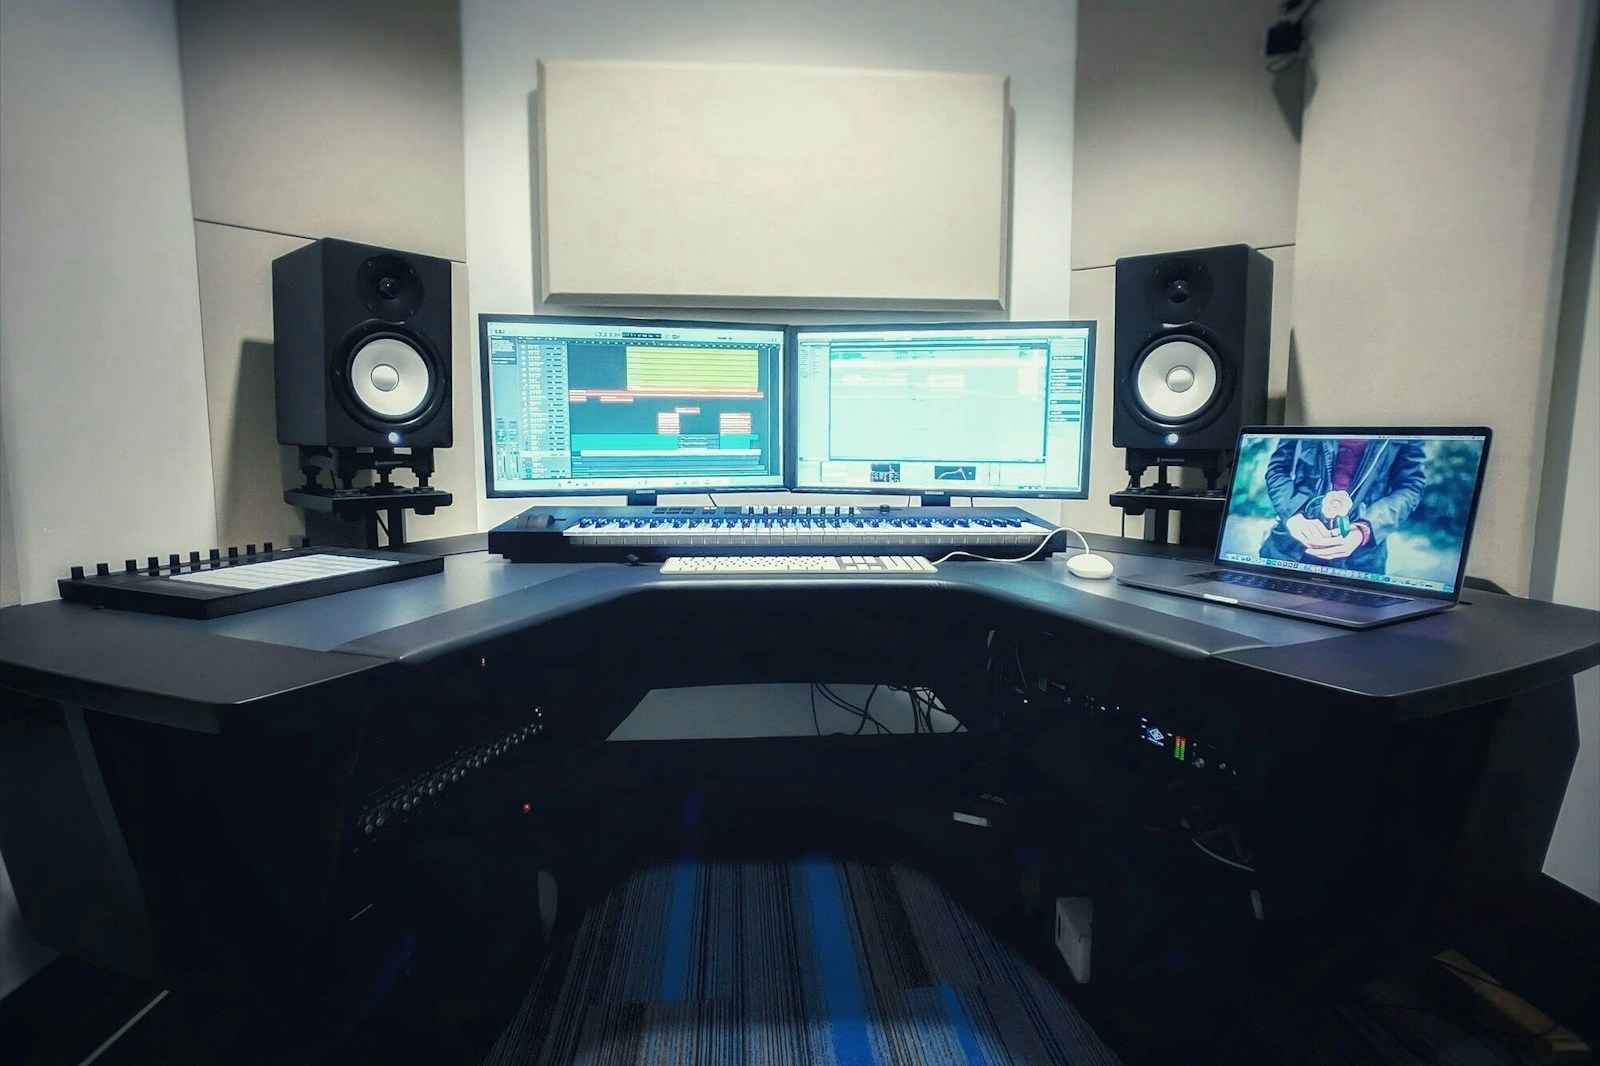
Studio Monitors vs Headphones: Which Should You Start With?
This is the single most debated topic among home studio beginners. Here’s the honest answer: if your room is untreated — meaning you haven’t added any acoustic panels, bass traps, or diffusers — studio monitors will likely sound bad. They’ll reflect off walls, create standing bass waves, and make your mixes sound boxy. You’ll compensate by cranking the volume, which just makes everything worse.
For most beginners in untreated bedrooms or apartments, start with studio headphones. They bypass the room entirely, giving you a much more accurate picture of your mix. The Beyerdynamic DT 770 Pro (80 ohm version) is a legend for tracking and mixing. The Audio-Technica ATH-M50x is another solid choice. Do not use gaming headsets — they color the sound for immersion, not accuracy. You need open-back headphones for mixing (they sound more natural) but closed-back for recording (to avoid bleed into the mic). Start with a good pair of closed-back, then add an open-back like the Beyerdynamic DT 990 Pro later.
If you’re set on monitors and you can treat your room minimally, go for it. Just know that a $300 pair of monitors will sound worse than a $150 pair of headphones in an untreated room. Prioritize headphones first.
Microphone Basics: Dynamic vs Condenser for Home Recording
Microphone choice depends on what you’re recording, but for a first mic, there’s a safe bet: start with a dynamic microphone. Why? Dynamics are less sensitive, meaning they pick up less room noise and background rumble. In an untreated room, that’s gold. The Shure SM57 is the most recorded instrument in history. The Shure SM58 is its vocal cousin. Both are built like tanks, cost under $100, and sound good on everything from vocals to guitar cabinets.
Condenser microphones (like the Audio-Technica AT2020) are more sensitive and detailed. They capture more nuance, but they also capture your air conditioner, the neighbor’s dog, and the echo in your untreated bedroom. If you have a quiet, well-treated room, a condenser will give you a richer vocal sound. But for a first microphone, the SM57 or SM58 is the move. Once your room is treated and your interface is solid, upgrade to a condenser.
Pro tip: a $100 microphone through a $200 interface will sound better than a $500 microphone through a $60 interface. Prioritize your signal chain in order: interface preamps > microphone > cables. Skills matter most, but good gear removes friction.
Room Treatment on a Budget: Fix Your Sound Without Breaking the Wall
Acoustic treatment is the single most impactful upgrade you can make for your sound quality. But you don’t need foam panels costing hundreds of dollars. Start with what you have. Here’s a real-world approach: before buying anything, walk into your room and clap loudly. If you hear a slap echo, your room is acoustically alive. That’s bad for recording and mixing.
DIY hacks that actually work:
- Moving blankets: Hang thick moving blankets on mic stands behind your microphone when recording. This kills reflections instantly. Cost: $15 each.
- Bookshelves: A bookshelf full of books acts as a natural diffuser. Place one behind your listening position or along a reflective wall.
- Carpet: Hardwood floors bounce sound. Add a thick rug in front of your desk and mic stand.
- First reflection points: Sit where you’ll mix. Have a friend hold a mirror against each wall. If you can see the speakers in the mirror from your listening position, that’s a first reflection point. Place a moving blanket or a bought panel there.
- Egg crates are a myth: They don’t absorb sound; they just scatter high frequencies. Your low-end rumble will remain. Don’t waste time or money.
I once recorded an EP entirely with a Shure SM57, a Focusrite interface, and moving blankets draped over a mic stand in a 10-foot-square bedroom. The album was picked up by a small label. Treatment matters, but perfection isn’t required.
Speaker Placement: Where to Put Your Monitors for Honest Sound
If you’ve chosen monitors, placement is critical. Even expensive monitors sound awful in the wrong spot. Here’s the rulebook:
- Equilateral triangle: Your listening position and the two speakers should form an equilateral triangle. Measure the distance between the speakers, then sit that same distance back. Your head should be the third point.
- Ear height: The tweeter (small driver) should be at ear level. Bookstore or monitor stands help. Don’t angle them up or down.
- Distance from walls: Keep monitors at least 6-12 inches away from the wall behind them. The closer they are, the more exaggerated your bass perception becomes. Too far, and you lose low-end clarity. Test a few inches.
- No mirror, no problem: If your desk is a hard surface, reflections will muddy your sound. Place a folded towel in front of each monitor for a quick fix.
If you can’t place them perfectly, don’t panic. A decent pair of headphones will serve you better for critical mixing decisions. Monitors are for listening, not mixing, for many beginners.
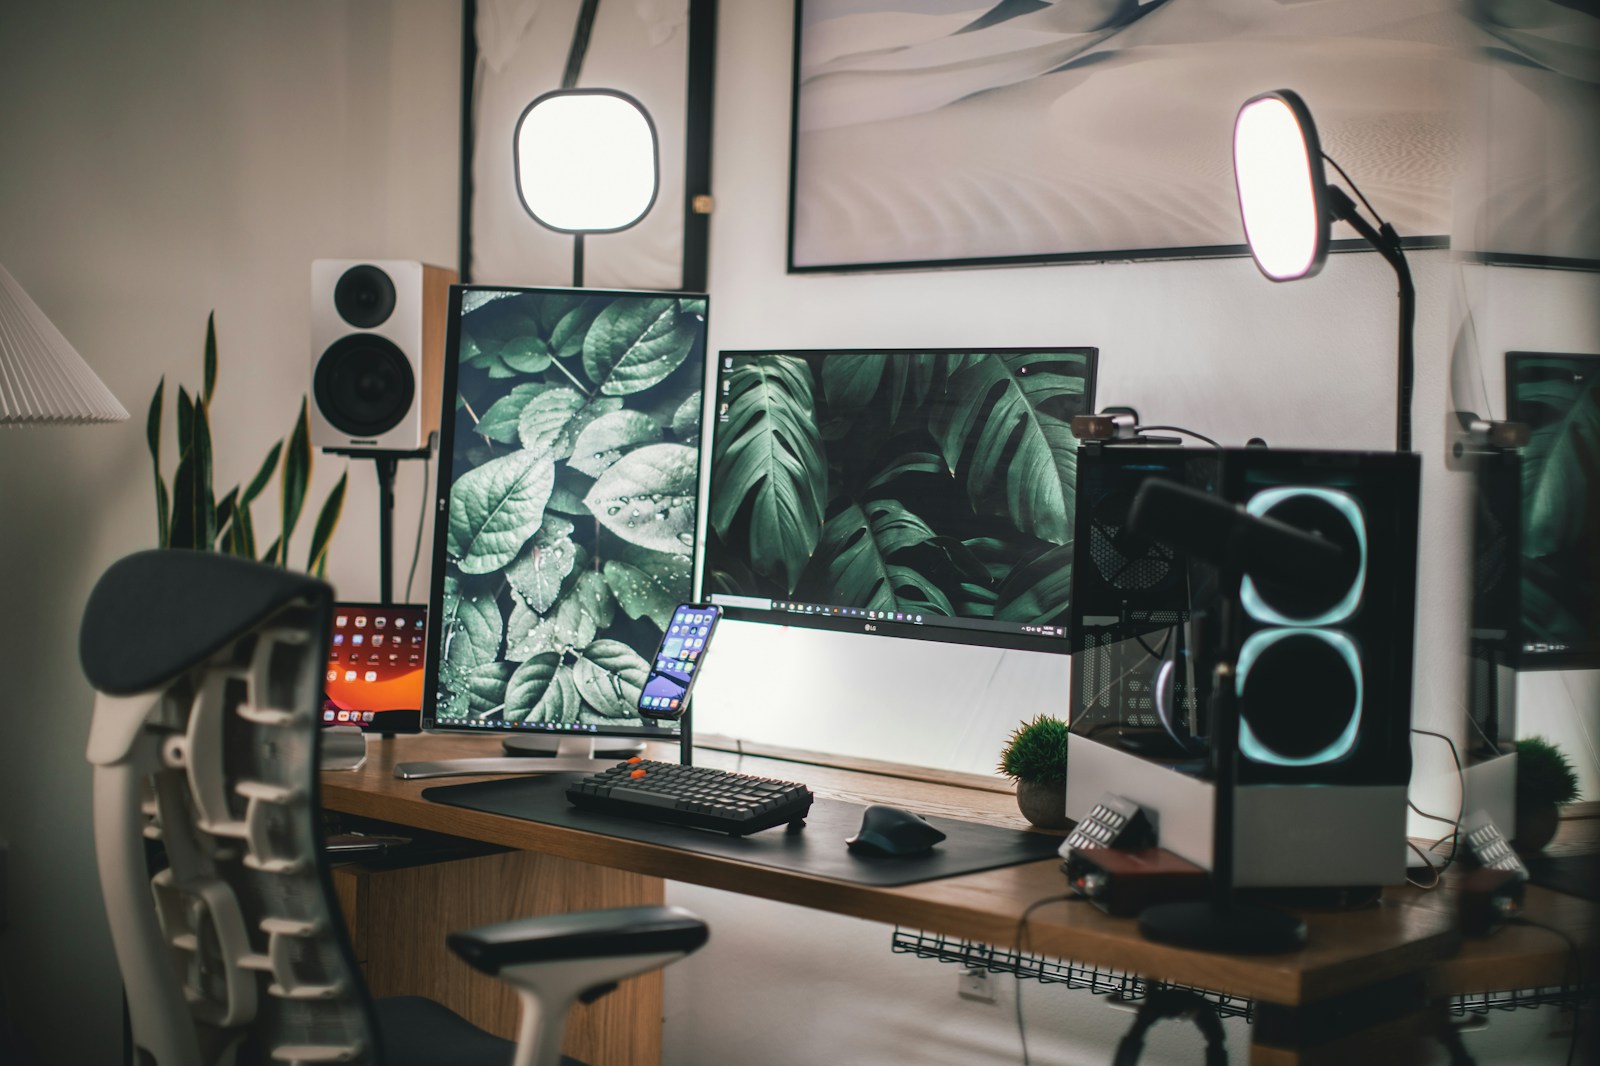
Cable Management and Desk Layout: The Setup That Keeps You Creative
Here’s a hidden truth about home studios: a messy setup kills creativity. When cables are tangled, you can’t find the right one. When your desk is cluttered, you waste mental energy navigating. When your microphone stand takes up half the room, you avoid recording. Don’t underestimate the friction of bad organization.
- Use velcro ties: Wrap cables individually. Group them by function (power cables separate from audio cables to avoid noise). Color-code if you’re feeling ambitious.
- Label everything: Write on masking tape or use a label maker. “Mic 1,” “Guitar Left,” “Headphones.” When you’re troubleshooting a buzz at 2 AM, labels save you an hour.
- Keep the desk clear: Only the essentials: audio interface, mouse, keyboard, and possibly a small controller. Put your computer tower or laptop off to the side. More flat surface = less distraction.
- Elevate your interface: If it’s on your desk, prop it up on a small stand or a book. This keeps cables off the desk and reduces accidental disconnections.
Organization isn’t about being tidy for Instagram. It’s about removing obstacles between you and recording. Every second you spend untangling a cable is a second you’re not being creative. Invest 20 minutes now, save hours later.
Step-by-Step: How to Connect Everything in Your Home Studio
Let’s walk through the physical setup. This assumes you have your gear unboxed and ready.
- Place your desk: Position it away from walls if possible. Place monitors or headphones where you’ll sit.
- Connect interface to computer: Use the included USB cable. Plug into a USB port on your computer, not a hub or extension cable. This ensures stable power and data.
- Install drivers: Download the latest drivers from the manufacturer’s website. Install before connecting for the first time if instructed. Reboot your computer.
- Connect monitors: Use balanced cables (TRS or XLR) to connect monitor outputs to your interface. Turn monitors volume all the way down before powering on.
- Connect microphone: If using a condenser, you’ll need phantom power (+48V). Press the button on your interface. For dynamic mics, phantom power isn’t needed. XLR cable plugs into mic and interface.
- Connect headphones: Plug into the headphone output on the interface, not your computer. This gives you direct monitoring with low latency.
- Turn everything on: Power on your interface first, then your computer if it’s off. Then monitors last. This avoids pops and clicks.
- Configure DAW: Open your DAW. Go to audio settings. Select your interface as the audio input and output device. Set buffer size to 128 or 256 samples for recording. You might need to adjust for latency.
Test: Play a track in your DAW. If you hear sound through your headphones or monitors, you’re connected. If not, check your cables, driver installation, and DAW settings. Patience — this step trips up everyone.
First Recording: How to Get a Clean Signal Right Away
Now for the exciting part: hitting record. But before you do, understand gain staging. Gain staging simply means setting levels so your signal is loud enough without clipping or adding noise. Here’s the process:
- Set your microphone: Place it about 6-12 inches from the sound source (vocals, guitar amp). Closer gives a fuller sound but more proximity effect (boomy bass). Farther gives more room sound.
- Set gain on interface: Speak or sing at your loudest volume. Turn the gain knob until the meter on your interface peaks at -12dB to -6dB. The clipping light should never turn on. Aim for the green zone.
- Use direct monitoring: On your interface, press the direct monitoring button. This sends your input signal directly to your headphones with zero latency. You’ll hear yourself as you perform without delay.
- Arm a track in your DAW: Create a new audio track. Select your interface input (Input 1 or 2). Arm the track (record-ready button). You’ll see a level meter in your DAW — it should match the interface.
- Record a test: Press record. Play/speak for 10 seconds. Stop. Listen back. If it’s distorted, lower the gain. If it’s too quiet, raise it. Don’t use volume faders for gain — always adjust at the interface first.
Common beginner mistakes:
- Clipping the interface: You see a red light on your interface or DAW meter. Lower gain immediately.
- Recording too quiet: You then crank gain in your DAW, which amplifies noise. Get a strong signal at the source.
- Using USB mics or cheap adapters: They add latency and noise. Stick to XLR into an interface.
- Recording without headphones: If you’re using monitors, the mic picks up playback, causing echo or feedback. Always track with headphones.
Your first recording won’t be perfect. That’s fine. The goal is to get a clean, usable take. Everything else — mixing, effects, edits — comes after. Focus on capturing the performance well.
What to Upgrade Next: A Smart Path for Your Studio Growth
Once you’ve made a few recordings, you’ll start to hear limitations. That’s growth. But don’t rush to upgrade everything at once. Here’s a smart sequence:
- Better microphone: After you’ve learned with a dynamic mic, upgrade to a condenser like the Audio-Technica AT2020 or a Rode NT1-A. You’ll hear more detail.
- More inputs: If you’re recording multiple sources (vocals and guitar simultaneously), a 4-input interface like the Scarlett 4i4 gives you flexibility.
- Acoustic panels: Buy or build 2-4 panels for first reflection points and behind your listening position. Bass traps in corners are next. This is the biggest improvement per dollar.
- MIDI controller: A small keyboard (like the Arturia KeyLab Essential) for playing virtual instruments enhances your workflow.
- Reference headphones: Open-back headphones like the Beyerdynamic DT 990 Pro for mixing. Your closed-back pair can stay for tracking.
- Monitor upgrade: Only after room treatment. Look at Yamaha HS series or KRK Rokits if you want bass response.
You don’t need everything. Only upgrade when you can articulate exactly what’s holding you back. If your recordings sound fine on headphones, you don’t need monitors. If your room is untreated, a better microphone won’t solve your problems. Be patient and prioritize fixes that actually impact your sound.
Common Beginner Pitfalls (And How to Avoid Them)
Every home studio producer has made these mistakes. Learn from ours so you can skip the frustration.
- Buzz or hum in your signal: This is usually ground loops caused by multiple devices drawing power from different outlets. Plug everything into one power strip or conditioner. Check that your microphone cable isn’t running parallel to power cables.
- Overcompression: Beginners often compress vocals too aggressively, making them sound lifeless. Start with a 2:1 ratio and gentle threshold. Listen to what compression does — don’t slap it on every track by default.
- Listening too loud: If you’re monitoring at high volumes, your ears fatigue quickly. You’ll make decisions based on temporary perception, not accuracy. Keep levels at a conversation-friendly volume.
- Buying gear before treating the room: A $2,000 microphone in a reflective bedroom will sound worse than a $100 microphone in a treated space. Treatment is your first purchase, not your last.
- Ignoring the manual: Your audio interface and DAW have detailed guides. Spend 15 minutes reading them. They answer 80% of your early questions.
Mistakes are part of the process. Document them. Fix them. Move on. Every pro you admire started by making the exact same errors.
Frequently Asked Questions About Building a Home Studio
How much should I budget for a beginner home studio?
A solid setup can be built for $500-$800. Breakdown: interface ($150), headphones ($150), microphone ($100), DAW ($200 if you buy, free if you start with GarageBand). Your computer covers the rest. Don’t stretch beyond your needs.
Should I use a laptop or desktop for music production?
Laptop if you travel or record in multiple rooms. Desktop if you want more power per dollar and easier upgrades. Many producers use a MacBook Pro or Windows laptop with a powerful CPU. Either works.
USB vs Thunderbolt interface — which is better?
USB is fine for 95% of beginners. Thunderbolt offers lower latency but costs more and requires compatible ports. Don’t prioritize it unless you’re recording multiple tracks simultaneously and latency is critical.
How much acoustic treatment is enough?
For a small room, treat first reflection points and add a bass trap in each corner. That’s usually 4-6 panels and 2-4 bass traps. More is better, but this minimum removes 80% of problems.
Can I use a gaming headset for music production?
Technically yes, but practically no. Gaming headsets are designed for immersion, not accuracy. They boost bass and roll off treble. You’ll make poor mixing decisions. Buy dedicated studio headphones.
Your Home Studio Journey Starts Here
Here’s the honest truth: you don’t need perfect gear. Some of the most impactful records of the last decade were made in bedrooms with gear that would make a gear forum person cringe. What those creators had was a willingness to start, to record imperfectly, and to improve one step at a time.
Follow the steps in this home studio setup guide — start with the Core Four, treat your room on a budget, connect everything step by step, and make your first recording without overthinking. The gear is just the container. The creativity inside is what matters.
If you’re ready to start, check out our recommended gear list below. Every item has been tested, used, and confirmed to deliver for the price. No hype, just what works.