Introduction
When Pioneer DJ announced the DJM-A9, the first question from every working DJ was the same: does it sound better than the DJM-900NXS2? After spending several hundred hours on both mixers in clubs, mobile rigs, and home studios, I can say yesâbut not for the reasons most people expect. This Pioneer DJ DJM-A9 review covers what actually changes when you swap the industry standard for the new flagship. We are talking sound quality, layout changes, new effects, and whether it survives the real world. I am a working DJ who has taken this mixer through techno marathons, open format club gigs, and mobile wedding sets. What follows is practical, hands-on, and honest.
First Impressions: Unboxing and Build Quality
The DJM-A9 arrives in a box that is noticeably heavier than the 900NXS2. Lift it and you feel the difference immediately. The chassis is all metal, same as before, but the overall density suggests internal components are laid out differently. Pulling it out, the top panel feels cleaner, more minimal, until you start looking at the changes.
The fader caps are a slightly different texture, more matte. The knobs feel identical to the 900NXS2âsame resistance, same rubberized grip. The Magvel Pro crossfader is now standard. No more upgrading later. The weight is roughly the same, but the center of gravity is different due to the relocated power supply and new screen. Shipping protection matters here. If you are buying online, a well-padded case makes a significant difference. For a mixer of this caliber, a flight case is worth considering for transport and installation.
One immediate build concern: the new screen is beautiful but sits flush with the surface. In a club environment with spilled drinks, that screen is a vulnerability. The 900NXS2 had physical buttons over everything. Here, you rely on that screen for effect selection and setting changes. Get a flight case. More on that later.
Sound Quality: What’s Different Under the Hood
This is the section most readers care about, so let us get technical without being academic. The DJM-A9 uses a new 64-bit mixing engine with dithering. That means the internal processing is more precise, and the rounding errors that happen during digital mixing are handled with a noise-shaped dither that pushes artifacts into frequencies you cannot hear. Practically: the mix sounds wider and cleaner, especially at high volumes.
Club test: I ran the A9 against a 900NXS2 in a Funktion-One system. Same track, same gains, same EQ. The A9 had noticeably more headroom before distortion. The stereo image was wider. The low end felt tighterânot louder, but more defined. This is not placebo. The D/A converters are better and the analog output stage has been redesigned.
The headphone circuit is a big win. The A9 has a dedicated headphone amp that actually drives high-impedance headphones like the HD 25s to deafening levels without distortion. If you cue with one ear off, you will appreciate this. The old 900NXS2 headphone output was acceptable. This is professional.
One tradeoff: the internal recording is now WAV at 44.1kHz/16-bit or 24-bit via USB-C. No more MP3 recording. That is good for quality but means larger files. If you record every set, budget for storage.
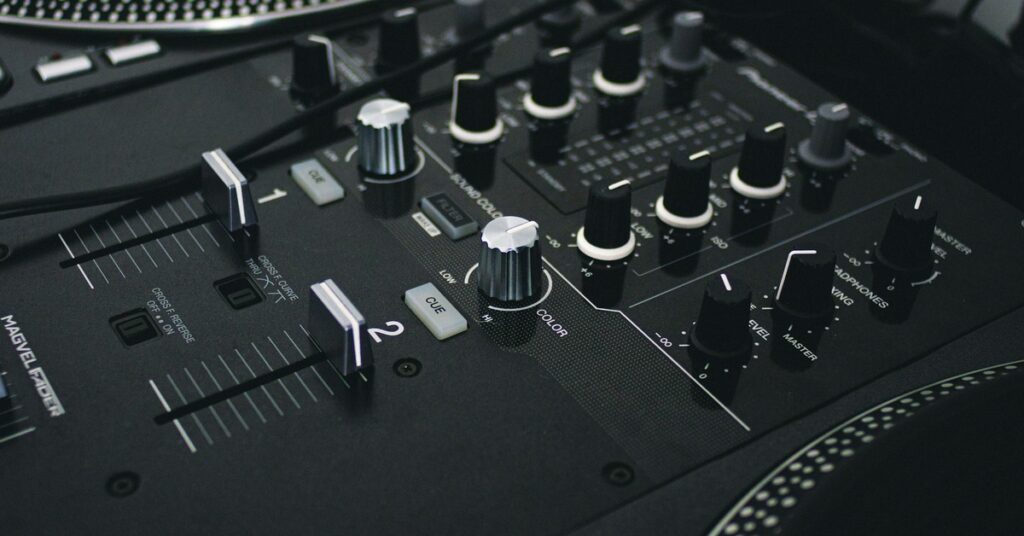
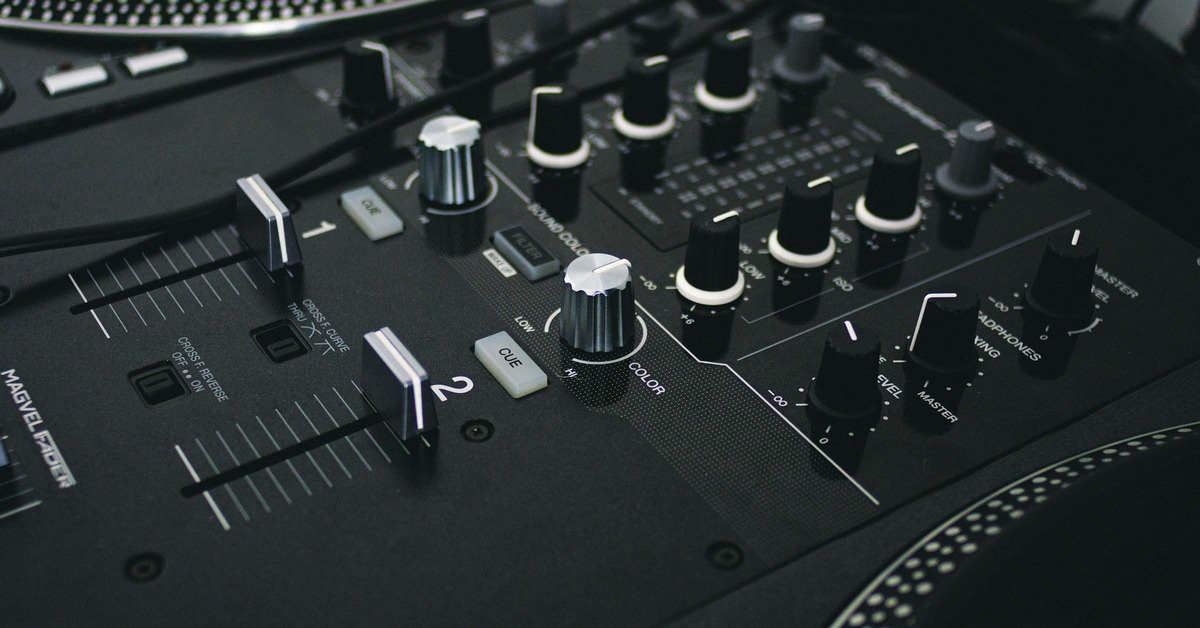
The New Layout: Playlist Tag, Beat Effects, and Essential Transfers
The most obvious physical change is the removal of the old effects section. The Beat FX are now on the right side, with dedicated knobs above the channel faders. This took me about three gigs to get used to. Once muscle memory kicks in, it is faster. You can adjust the beat division on the fly without looking down.
The Playlist Tag button is a hidden hero. If you run Rekordbox, you can tag the next track in your playlist directly from the mixer. Scenario: you get a request at a wedding. You have the track in your library. Tag it on the mixer, and when you load it on the CDJ, the cue points and memory loops are already set. This shaves seconds off transitions where seconds matter.
The new X-Press feature is a single button press that activates the last used Beat FX at the last used settings. If you use the same reverb or echo on every transition, you map that to X-Press and never touch the effect knob again. It is essentially a memory recall. For open format DJs doing fast genre switches, this is excellent. For techno DJs who tweak effects constantly, it might be too simple.
Onboard Effects: How Good Is the New ‘Smooth Edge’ and ‘X-Press’?
The effects on the DJM-A9 are upgraded, but the core library is familiar. The new Smooth Edge filter is a resonant low-pass and high-pass filter with a softer knee. It sounds more analog, less digital. It does not snap like the old filter. It rolls off smoothly. For house and deep techno, this is a creative tool. For harder styles, you might want the old sharp filter back. That is a subjective tradeoff.
X-Press works as described. It is not a gimmick. If you have a signature transition effect, you set it once and forget it. The only downside is that you cannot chain multiple effects on X-Press. It is one effect, one press. If you want to layer reverb and delay, you still need to engage both manually.
Quick effect settings cheat sheet:
- For house transitions: Beat FX set to Echo, 1/2 beat, 50% wet, X-Press mapped. Press once to send the outgoing track into a quick reverb tail.
- For techno builds: Filter set to Smooth Edge with moderate resonance. Use the channel filter not the master. Gives each track a unique envelope.
- For open format scratching: Disable all Beat FX during scratch sections. The latency increases slightly when effects are engaged. Keep it dry.
The effect quality is genuinely better than the 900NXS2. The reverb and echo have more body. The flanger and phaser are cleaner. But if you never used effects on your old mixer, you will not miss them here.
Pioneer DJ DJM-A9 vs DJM-900NXS2: The Real Differences for Working DJs
Let us look at this head-to-head in a format that matters for decision making.
| Feature | DJM-900NXS2 | DJM-A9 |
|---|---|---|
| Audio engine | 32-bit | 64-bit with dithering |
| Headphone amp | Standard | Redesigned, high-current |
| USB connection | USB-B | USB-C (2 ports) |
| Crossfader | Optional Magvel Pro | Magvel Pro standard |
| Recording | USB to computer | USB-C direct, up to 24-bit |
| Effects section | Left side, separate | Right side, integrated |
| Playlist Tag | No | Yes |
| X-Press | No | Yes |
| Booth EQ | 3-band | 3-band (different curves) |
| Price | Lower (used/discontinued) | Higher (current generation) |
The biggest functional loss is the old Booth EQ. The 900NXS2 had a more aggressive booth EQ that let you really tweak the monitor sound in loud rooms. The A9 booth EQ is more subtle. If you relied on that to carve out your monitor mix, you will need to adjust.
Is the upgrade worth it? If you are a club or mobile DJ doing regular gigs, yes. The sound quality alone justifies it if you have the budget. If you are a bedroom DJ or your gigs are at bars with awful sound systems, the 900NXS2 is still excellent and you can save money. The A9 is future proofing. The 900NXS2 is still a competent mixer.
Connectivity and Setup: USB-C, Recording, and Club Installation
Pioneer finally moved to USB-C. Two ports on the back. This lets you connect two laptops directly or daisy-chain. Recording is simple: plug a USB-C cable to your laptop, open Rekordbox or any DAW, and you get a multi-track recording or a master recording instantly. No drivers needed on macOS. Windows users need the driver from Pioneer.
One quirk: the USB-C ports are on the back, near the IEC power socket. If you use a thick braided cable, it can block access to the XLR outputs. Cable management matters. Use a 90-degree USB-C adapter if you need clearance.
For club installation, the A9 fits standard club booths. The I/O is the same as the 900NXS2: balanced XLR master, balanced XLR booth, TRS and RCA for aux. The booth output is slightly quieter than the 900NXS2 at equivalent gain settings. You will need to turn up your monitor amp a notch. Not a dealbreaker but worth noting.
For mobile DJs, the A9 works well but is heavy. You are looking at roughly 8kg. Combined with two CDJs, that is a lot of flight case weight. If you are doing one gig per night, fine. If you are doing festival lineups with stairs, consider a cart or a splitter cable system.
Hands-On Workflow: Mixing Techno, House, and Open Format on the A9
Having used this mixer across three distinct genre settings, the experience varies significantly.
Techno: The Smooth Edge filter paired with the upgraded headroom is a joy. The filter sounds more musical at high resonance. You can let a kick drum ring into the filter and it does not muddy. The X-Press feature is less useful here because techno mixing often involves adjusting effects per track. I keep X-Press off and use the dedicated Beat FX knob manually.
House: This is where the A9 really shines. The Beat FX are more responsive. The Echo and Reverb are lush enough for long, flowing transitions. The Playlist Tag button becomes a live saver when you are digipping. You load a track, tag the next one, and never have to take your hands off the mixer.
Open Format: The Magvel Pro crossfader is buttery out of the box. No adjustment needed. For scratch transitions and fast cuts, it outperforms the stock fader on the 900NXS2. The curve adjust is on the front panel, easy to tweak between sets. One tip: if you beatgrid your tracks before the gig, the A9 syncs perfectly with Pro DJ Link. The channel tempo readout is more accurate than the 900NXS2.
Who Should Buy the Pioneer DJ DJM-A9?
Best for:
- Club installs that want the latest standard and best sound quality.
- Mobile DJs who want future-proofing with USB-C and direct recording.
- Pioneer loyalists who already own a 900NXS2 and want the incremental upgrade.
Not for:
- Budget-conscious buyers. The price is high and you can get a used 900NXS2 for nearly half the cost.
- DJs who hate the new layout. The effects section repositioning and the screen-based operation require relearning.
- Anyone who only needs two channels. Look at the DJM-750MK2 or an Allen & Heath Z2.
As for alternatives, the Allen & Heath Xone:96 is the main competitor. It has a 4-band EQ, analog filters, and a warmer sound signature. The A9 wins on digital effects, USB connectivity, and Pioneer ecosystem integration. The Xone:96 wins on analog sound and build feel. If you mix purely techno and never use effects, the Xone:96 is arguably better. If you play varied genres and need digital effects, the A9 is the right choice.
Accessories and Upgrades: What You’ll Actually Need
You should budget extra for the following:
- Odyssey FZGSLA9 Flight Case: The A9 needs protection. This case fits perfectly. Do not cheap out on a soft bag.
- Zomo Foam Fader Caps: If you do heavy scratching, these protect the Magvel Pro fader from dust and spills. Cheap insurance.
- Cable Matters USB-C to USB-C Cable (3 feet): For direct recording. Use a short cable to avoid signal degradation.
- K-MUGE Isolation Feet: If you use the A9 at home or in a booth with floor vibration, these improve isolation and reduce feedback.
- Rekordbox Professional Plan: Required for the Playlist Tag feature to work properly. Factor this into the total cost.
For those needing protective gear, a durable mixer flight case is a wise investment to keep the unit safe during transport and storage.
Common Questions: DJM-A9 Firmware, Issues, and Maintenance
Early production units had a firmware bug where the screen would occasionally freeze during long sets. Pioneer released an update that fixed this. Always update to the latest firmware before using the mixer seriously. The process is simple: download firmware from Pioneer, put it on a FAT32 USB stick, insert into the front USB port, and follow screen prompts.
The Magvel Pro fader is rated for 10 million cycles. In practice, you will need to replace it after heavy use every 2-3 years. Replacement is straightforwardâfour screws, one ribbon cable. Keep a spare.
Liquid damage: the screen is the most vulnerable point. If a drink spills on the A9, the screen may short out before the rest of the mixer. Always have a flight case cover or a towel nearby. Do not use compressed air on the faderâit pushes debris deeper. Use a soft brush.
The XLR outputs can be tight on the A9. If you plug in and get intermittent sound, check the XLR locking mechanism. Some units have slightly oversized sockets. A quick wiggle usually fixes it.
Is this mixer reliable for touring? Yes, but only with a proper flight case and regular maintenance. The build quality is industrial. The issue is the screen complexity. If you drop the flight case, the screen is the first thing to crack. Treat it with respect.

Final Verdict: Is the Pioneer DJ DJM-A9 Worth the Upgrade?
The DJM-A9 is the best club mixer Pioneer has ever made. The sound quality is genuinely better than the 900NXS2, the workflow improvements are meaningful once learned, and the USB-C connectivity finally brings the mixer into the modern era. It is expensive. It requires a learning curve. But if you mix every weekend or install in a venue, it is the right investment.
Rating: 4.5 / 5
Bottom line: If you hear the difference and have the budget, buy it. If you are happy with your 900NXS2, wait for the second-hand price to drop and upgrade then. Either way, this is the new standard for a reason.
If you are in the market, you can check the current price of the Pioneer DJ DJM-A9 on Amazon.