Introduction
If you run a home studio or produce your own music, the phrase ‘vocal recording chain setup’ might sound technical. It’s really just the path your voice takes from the microphone into your recording software. Every link in that chainâmicrophone, cable, preamp, interfaceâshapes what you hear at the end. A weak link introduces noise, muddiness, or thinness. A well-chosen chain gives you a clean vocal that needs less fixing later. This guide breaks down each part, how they connect, and the mistakes that waste time and money. Whether youâre recording vocals for a song, a podcast, or voiceover, understanding this chain is the difference between sounding like a demo and sounding like a release. Beginners looking for a starting point might explore budget-friendly studio microphone kits to assemble their first chain.
What Is a Vocal Recording Chain?
A vocal recording chain is the sequential signal path from the microphone to your computer. Think of it like a relay race. The microphone captures sound and converts it into an electrical signal. That signal travels through a cable to a preamp, which boosts it to a usable level. From there, the audio interface converts the analog signal into digital data and sends it to your DAW (Pro Tools, Logic, Ableton, etc.). Each stage has its own job. If any stage introduces noise, distortion, or frequency imbalance, the final recording suffers. The most obvious example is using a cheap cable that picks up interferenceâsuddenly that pristine vocal has a hum underneath. Every link matters.
The chain doesnât end at the DAW. You could argue that plugins and processing are part of it. But for this guide, weâre focusing on the physical hardware side. Thatâs where most people run into problems. They buy a great mic but plug it into a noisy interface with no preamp control. Or they use an instrument cable instead of an XLR and wonder why the signal sounds weak. Once you understand the flow, you can troubleshoot and upgrade intelligently.
Microphone Selection: Dynamic vs. Condenser vs. Ribbon
Your microphone is the first decision in the chain. The three main types are dynamic, condenser, and ribbon. Each works differently and suits different situations.
Dynamic microphones (like the Shure SM57 or SM7B) are rugged and handle high sound pressure levels well. Theyâre less sensitive to background noise, which makes them great for untreated rooms or loud sources. If youâre recording in a bedroom with a computer fan humming or traffic outside, a dynamic mic rejects a lot of that. They also donât need phantom power. The tradeoff is they capture less detail and high-frequency air. For aggressive vocals, rock, or podcasts, dynamics are a solid choice. The SM7B is a classic for a reason. It has a warmer, thicker sound that sits well in a mix. Those tracking in untreated spaces often find dynamic vocal microphones a practical first investment.
Condenser microphones (like the Audio-Technica AT2020 or Rode NT1) are more sensitive and capture a wider frequency range. They pick up subtle detailsâbreaths, room reflections, sibilance. Thatâs great for delicate vocals or when you want a clean, modern pop sound. The downside is they also capture everything else: your neighborâs dog, the refrigerator hum, the sound of your chair creaking. You need a treated room or at least some acoustic panels to get the most out of a condenser. Additionally, they require phantom power (48V) from your interface or preamp.
Ribbon microphones (like the sE Electronics Voodoo VR1 or Cascade Fat Head) are less common but offer a vintage, smooth character. They capture sound from both sides (figure-8 pattern) and handle high SPLs poorlyâso you canât put them right up against a loud amp. For vocals, they can produce a beautifully natural, non-fatiguing tone. But they are fragile and often quiet, requiring a very clean preamp with lots of gain. Ribbons are more of a specialist tool, not the first mic for a beginner.
Best for home studios: If your room is untreated, start with a dynamic mic like the SM7B. If you have some acoustic treatment, a condenser like the Rode NT1 gives you more flexibility. Avoid the temptation to buy a condenser just because itâs cheaper. A dynamic that rejects noise is better than a condenser that records every flaw in your room.
The Role of the Preamplifier in Your Chain
The preamp (preamplifier) takes the weak signal from your microphone and amplifies it to a level the audio interface can work with. Every interface has built-in preamps, but their quality varies. A cheap interfaceâs preamp might be noisy, thin, or lack headroom. An external preamp gives you more control over gain staging, impedance matching, and tonal coloration.
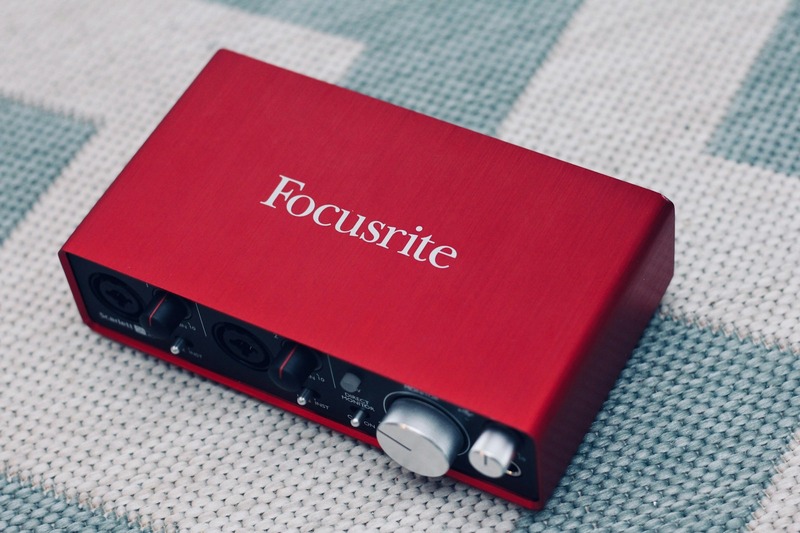
You donât need an external preamp to get good results. Many modern interfaces (Focusrite Scarlett series, Universal Audio Volt) have preamps that are perfectly usable. But if youâre chasing a specific sound, an external unit can make a difference. The Focusrite preamps are clean and neutralâthey let the microphoneâs character shine. Units like the Warm Audio WA12 or Universal Audio 610 add coloration. The WA12 has a slightly thicker, punchy low-mid that can make a thin microphone sound fuller. The UA 610 (a replica of the classic tube preamp) adds warmth and saturation that works beautifully on vocals.
The biggest mistake beginners make is ignoring impedance. Dynamic mics, especially ribbons, often need a preamp with higher impedance to match properly. Mismatched impedance can make a mic sound dull or lacking in presence. If youâre using an SM7B, for instance, many budget interface preamps donât have enough clean gain to drive it. Thatâs where an external preamp or a Cloudlifter comes in (more on that later).
Practical advice: Start with your interfaceâs built-in preamps. Learn how to set gain correctly. If you find yourself cranking the gain knob to 80-90% just to get a decent level, and the noise floor is high, thatâs a sign you need more clean gain. At that point, a dedicated preamp or a booster is worth investigating. For those wanting to expand, external microphone preamplifiers can be a targeted upgrade.
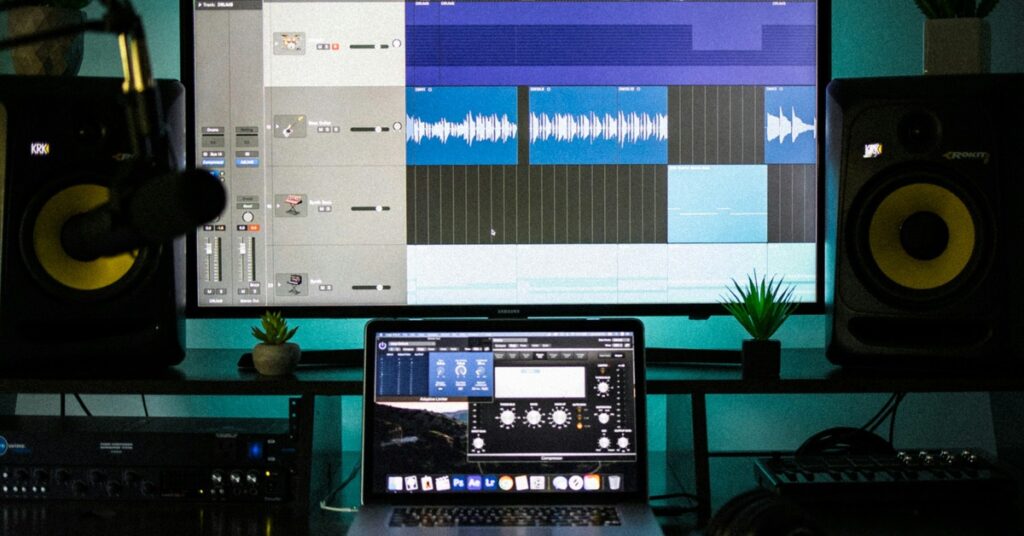
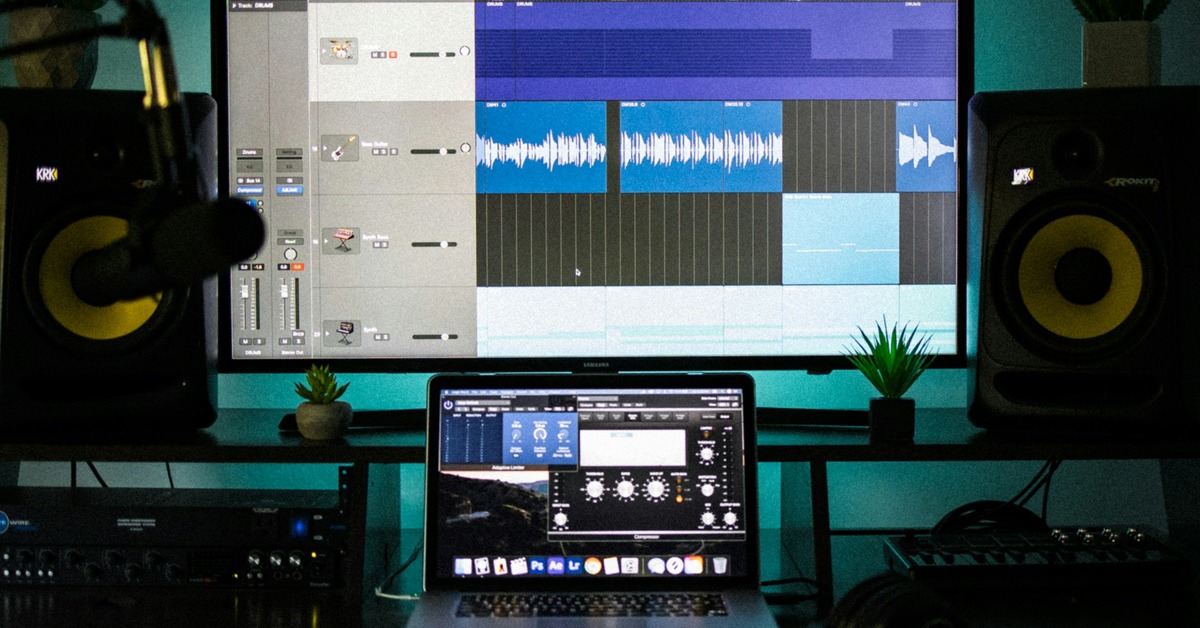
Audio Interface: The Hub of Your Signal Flow
The audio interface converts the analog signal from your preamp (or mic directly) into digital data your computer can understand. It also provides phantom power to condensers and acts as the headphone output for monitoring.
Key specs to look for: bit depth, sample rate, and input count. For vocal recording, 24-bit/44.1kHz is the standard. Higher sample rates (e.g., 96kHz) use more CPU without audible benefit for most vocal work. Focus on low latencyâthe delay between when you sing and when you hear yourself in the headphones. This is critical for keeping a performance tight. Entry-level interfaces like the Focusrite 2i2 or Universal Audio Volt 2 offer decent latency and good preamps. The Volt has a built-in vintage mode that adds some character. The RME Babyface Pro is a step upâits latency is class-leading, and its TotalMix software gives you deep control over routing. Itâs expensive, but if youâre tracking vocals regularly, itâs a long-term investment.
Connectivity matters too. USB-C is common now, and most modern interfaces use it. If youâre on an older computer with USB-A, check compatibility. Thunderbolt is faster but limited to newer Macs. Donât overthink thisâyour interface doesnât impact the tone as much as the mic and preamp, but a noisy or glitchy interface can ruin a session. Stick with reputable brands: Focusrite, Universal Audio, RME, Audient, MOTU.
Quick tip: Use the interfaceâs direct monitoring (the blend knob that mixes input and playback) rather than software monitoring. This eliminates latency entirely. It takes a second to set up, but itâs worth it.
Cables and Connectivity: Donât Overlook the Details
Cables are the most overlooked part of a vocal chain. A bad cable introduces hum, crackling, or outright signal loss. Always use balanced XLR cables for microphones. Balanced cables have three pins (hot, cold, ground) and reject electromagnetic interference. Guitar cables (TS) are unbalanced and should never be used for micsâthey pick up noise like an antenna.
Length matters. A 20-foot XLR cable is fine. A 50-foot cable might start to pick up RF interference or drop high frequencies due to capacitance. Keep cables as short as practical, but donât stress about a few feet. A decent quality XLR (like Mogami or Planet Waves) will serve you for years. Avoid the absolute cheapest cablesâthey have poor shielding and the connectors break easily. When setting up a permanent studio space, using balanced XLR audio cables is a reliable way to minimize noise from the start.
Common mistake: Running power cables parallel to audio cables. Thatâs a sure way to get a 60Hz hum. Cross them at right angles if they have to intersect. Also, check your cable connectors. Loose XLR pins can cause intermittent dropouts. A quick wiggle test before a session is smart.
Signal Flow: From Mic to DAW Step by Step
Hereâs the exact path your vocal takes, with a checklist to follow:
- Microphone â XLR cable. Connect the mic to the cable securely. Lock the connector if your mic has one.
- XLR cable â Preamp (or interface input). If youâre using an external preamp, plug into its input. If not, plug directly into your interfaceâs combo jack (XLR input).
- Preamp â Interface (if separate). Connect the preampâs output (usually TRS) to the interfaceâs line input (also TRS).
- Interface â Computer. Use a USB-C or Thunderbolt cable. Plug into a dedicated port, not a USB hub.
- Computer â DAW. Open your recording software and select the interface as the input device.
Now, gain staging. The goal is to get a strong, clean signal without clipping. In your DAW, aim for peaks around -12 to -6 dBFS (decibels below full scale). This leaves headroom for processing. If you clip (hit 0 dBFS), you get digital distortion thatâs impossible to fix. If your signal is too low, youâll have to boost it later, which also boosts noise.
To set gain: Have the vocalist sing the loudest part of the song at performance level. Turn the preamp gain knob until the DAW meter hits around -6 dB. Thatâs your baseline. Donât adjust gain while theyâre singing unless the dynamic range is huge. Also, check the output level on your interfaceâs meterâit should match the DAW meter.
Pro tip: Record at 24-bit/44.1kHz. Thereâs no benefit to higher sample rates for vocals, and they take up more disk space. 24-bit gives you plenty of dynamic range.
Common Mistakes in Vocal Chain Setup and How to Fix Them
1. Wrong Polar Pattern
Many condensers have multiple polar patterns (cardioid, figure-8, omnidirectional). Cardioid is standard for vocals because it picks up sound from the front and rejects sides and rear. Using omni in a noisy room will capture everything. Check the micâs switch before recording. Fix: Always use cardioid for solo vocal recording.
2. Improper Gain Staging
We already covered this. The biggest mistake is recording too hot (close to 0 dB) or too cold (peaks at -30 dB). Hot recordings clip and sound harsh. Cold recordings raise the noise floor when you boost them. Fix: Set gain for peaks at -12 to -6 dBFS.
3. Ignoring Room Treatment
A condenser mic in an untreated room sounds boxy, hollow, or reverby. You donât need expensive panels. Hang a blanket behind the singer, use a portable isolation shield, or stand in a closet full of clothes. Fix: Simple solutions work. For a start, put the singer in the center of the room, not near a wall.
4. Bad Cable Positioning
Laying an XLR cable next to a power strip or monitor adapter introduces hum. Also, stepping on cables damages them. Fix: Route cables away from power sources. Use cable ties to keep them off the floor if possible.
5. Ignoring Impedance Matching
As mentioned, dynamic and ribbon mics need a preamp that can handle their impedance. Using a low-impedance preamp on a ribbon mic will make it sound dull. Fix: Check the preampâs input impedance in the manual. For dynamic mics, aim for at least 10 times the micâs output impedance. For ribbons, even higher.
Do You Need a Cloudlifter or Inline Booster?
Gadgets like the Cloudlifter CL-1, Triton Audio FetHead, or sE DM1 are inline boosters that sit between your mic and preamp. They provide up to +20-25 dB of clean gain without adding noise. Theyâre most useful with dynamic mics that have low output, like the SM7B, SM57, or any ribbon mic.
When you need one: If your interfaceâs preamp is clean but doesnât have enough gain to drive your SM7B without being cranked past 70-80%, the Cloudlifter gives you that extra headroom. It also lowers the noise floor because the booster amplifies the signal before the interfaceâs preamp kicks in.
When you donât need one: If you have a modern interface with decent preamps (like Universal Audio Apollo or RME Babyface, or even a Focusrite Scarlett 4th gen), you might not need it. Many newer interfaces have enough clean gain for most dynamics. Also, if youâre using a condenser mic (which has its own active circuitry), you donât need a boosterâin fact, it could add unnecessary gain.
Practical recommendation: If youâre using an SM7B with an entry-level interface (Scarlett 2i2 or similar) and youâre seeing high noise when recording, a Cloudlifter is a good investment. If youâre using a high-end interface or a dedicated preamp, skip it.
Recommended Vocal Recording Chains at Different Budgets
Entry-Level ($300-500)
- Mic: Shure SM57 ($100) or Audio-Technica AT2020 ($150)
- Interface: Focusrite Scarlett Solo (Gen 4) ($160)
- Cables: Mogami Gold XLR (3 ft) ($30)
- Best for: Podcasting, beginner vocals, untreated rooms. The SM57 is rugged and forgiving.
Mid-Range ($800-1200)
- Mic: Shure SM7B ($400) or Rode NT1 ($250)
- Interface/Preamp combo: Universal Audio Volt 276 ($350) or Focusrite Clarett+ 2Pre ($500)
- Cables: Mogami Gold XLR (5 ft) ($35)
- Optional booster: Cloudlifter CL-1 ($150)
- Best for: Serious home studio vocals. The SM7B + Cloudlifter + Volt 276 is a pro-sounding setup that handles most sources well.
Pro-Sumer ($1500+)
- Mic: Neumann TLM 102 ($700) or AKG C414 ($1100)
- Preamp: Warm Audio WA12 ($400) or Universal Audio 610 ($600)
- Interface: RME Babyface Pro FS ($900)
- Cables: Mogami Gold Studio XLR (10 ft) ($40)
- Best for: High-quality vocal tracking, commercial-adjacent quality. The TLM 102 + WA12 is a classic combination with a silky top end and warm body.
Final Setup Checklist and Pro Tips
- Connect all gear in the correct signal flow order.
- Set phantom power on for condenser mics; off for dynamics and ribbons.
- Apply gain staging: peaks at -12 to -6 dBFS in the DAW.
- Check phase reversal switch on the preamp or interface if your signal sounds hollow.
- Test for hum by moving cables away from power sources.
- Record a test verse and listen back with headphones and speakers.
Pro tips: Record at 24-bit/44.1kHz. Use a pop filter for plosives. Place the singer 6-12 inches from the mic, slightly off-axis to avoid sibilance. A quiet room is more important than expensive gear. Before buying anything new, treat your roomâs reflection pointsâeven a heavy blanket can make a recording sound tighter.

Frequently Asked Questions
What does a vocal recording chain include?
It includes a microphone, a preamp (built-in or external), an audio interface, a computer, and cabling. Some definitions include headphones for monitoring and software for recording. The core physical chain is mic â cable â preamp â interface â computer.
Can I use a USB microphone?
Yes, but you lose control. USB mics have the preamp and converter built into the mic body. You canât upgrade the preamp separately. For podcasting or quick demos, theyâre fine. But for professional vocals, a separate chain gives you more flexibility and better sound quality over time.
Do I need a preamp if my interface has one?
Not necessarily. Many interface preamps are good enough for learning and even pro work if you choose a quality interface. Youâd add an external preamp if you want a specific tonal character (tube warmth, transformer saturation) or if you need more clean gain for a demanding mic.
Whatâs the difference between mono and stereo recording?
Vocals are almost always recorded in mono using a single microphone and a single track. Stereo uses two mics or a stereo source (like a synth). Recording vocals in mono saves disk space and CPU, and itâs standard practice until youâre doing effects like double tracking or widening.
Next Steps: From Setup to Recording
Now that you understand the vocal recording chain setup, itâs time to put it into practice. Set up your gear in your space. Experiment with microphone placementâmove it closer for more proximity effect (warmth) or farther for a more natural sound. Adjust your gain for different vocalists. Record a few takes and compare them. The best way to learn is to record, listen, and adjust. Thereâs no perfect chain that works for every voice. Trust your ears and make small changes.
Start with the entry-level recommendations if youâre on a budget. As you record more, youâll know when to upgrade. Good gear helps, but your skills and your room matter more. Record something today.