
Introduction
Putting together a home recording studio for under $1000 takes some careful thought about where to spend and where to cut corners. The gear you can get at this price point is surprisingly good these days. You can absolutely get usable recordings for demos, podcasts, voiceovers, and even early singles. The trick is knowing which components matter most and where you can get by with something cheaper. This guide covers exactly how to build a home recording studio under 1000 dollars without sacrificing the parts that actually determine sound quality.
The biggest mistake beginners make is spreading their budget too thin across a bunch of cheap items. A $50 microphone, a $60 interface, and free headphones won’t sound as good as a $200 interface paired with a $150 microphone. You want a system that works together as a unit. This guide walks through each component, explains the tradeoffs, and gives you a concrete plan that actually fits your budget.
The Core Philosophy: Spend on What Matters
With a $1000 budget, you can’t afford to waste money on things that don’t directly improve your recordings. The two most important pieces are the audio interface and the microphone. They set the baseline quality of everything you capture. Skimping here is the fastest way to regret your purchase within a week.
The audio interface is your digital bridge. It converts the analog sound from your microphone into digital data your computer can work with. It also supplies clean phantom power for condenser microphones and drives your headphones. A cheap interface introduces noise, latency, and unreliable drivers. A good one gives you years of trouble-free use. Plan to spend $150â$200 here.
The microphone is the second priority. A $100 dynamic microphone through a decent interface will sound better than a $400 condenser plugged into a $50 interface. The preamps in cheap interfaces are noisy and colored in a bad way. The microphone itself is only as good as the electronics feeding it. Beginners may want to compare popular options like the Shure SM57 and Audio-Technica AT2020 by checking current listings for dynamic microphones and condenser microphones.
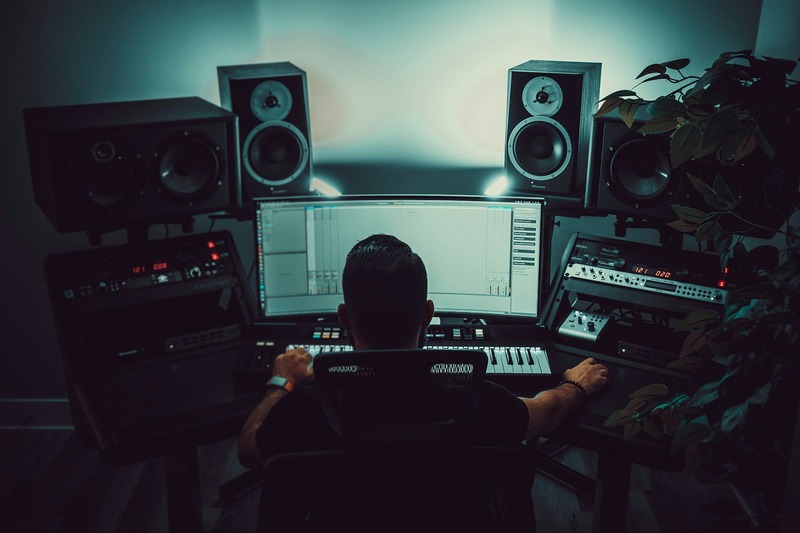
Studio monitors at this budget are nearly impossible to pull off right. Decent entry-level pairs run $500â$1500, plus you need room treatment for them to be useful. The smarter move is to invest in good closed-back headphones for tracking and open-back headphones for mixing. You can always add monitors later when your budget allows for proper treatment.
Cables, stands, and accessories matter more than beginners realize. A cheap XLR cable can introduce hum and interference that ruins a perfect take. A flimsy mic stand will sag or topple over. The difference between a $10 cable and a $25 cable isn’t just priceâit’s reliability and noise floor. Don’t go bottom-of-the-barrel on these items.
Set your expectations realistically. This setup will produce clean, professional-sounding recordings suitable for demos, podcasts, and indie projects. It won’t sound like a million-dollar studio. That’s fine. What matters is that the recordings are usable, consistent, and free of obvious technical flaws.
The Audio Interface: Your Digital Bridge
The audio interface is the single most important purchase you’ll make. It’s the central hub connecting your microphone, headphones, and computer. A good interface gives you clean preamps, reliable drivers, and low latency. A bad one introduces noise, causes dropouts, and makes recording frustrating. If you’re dealing with driver issues on a budget interface, upgrading to something like the Focusrite Scarlett 2i2 is worth consideringâbrowse audio interfaces to see current options.
The Focusrite Scarlett 2i2 is widely considered the best value in this price range. It gives you two inputs with decent preamps, a solid headphone output, and stable drivers for both Windows and macOS. Build quality is good enough for a home studio. The 2i2 runs around $170. That’s money well spent.
The tradeoff here is input count versus preamp quality. A two-input interface like the 2i2 is perfect for a solo musician or podcaster. If you plan to record multiple microphones at once, you might need a 4-input or 8-input interface, but those start at $300. At this budget, stick with two inputs. You can always record one track at a time for most projects.
Compatibility is another thing to consider. The Scarlett 2i2 works with practically every major DAW: Ableton Live, Logic Pro, Pro Tools, FL Studio, Studio One, Reaper, and more. It’s also USB-powered so you don’t need an external power supply. That makes it easy to move around your space. Check current prices on Amazon because they fluctuateâyou might snag it for under $150 during sales.
Choosing the Right Microphone for Your Needs
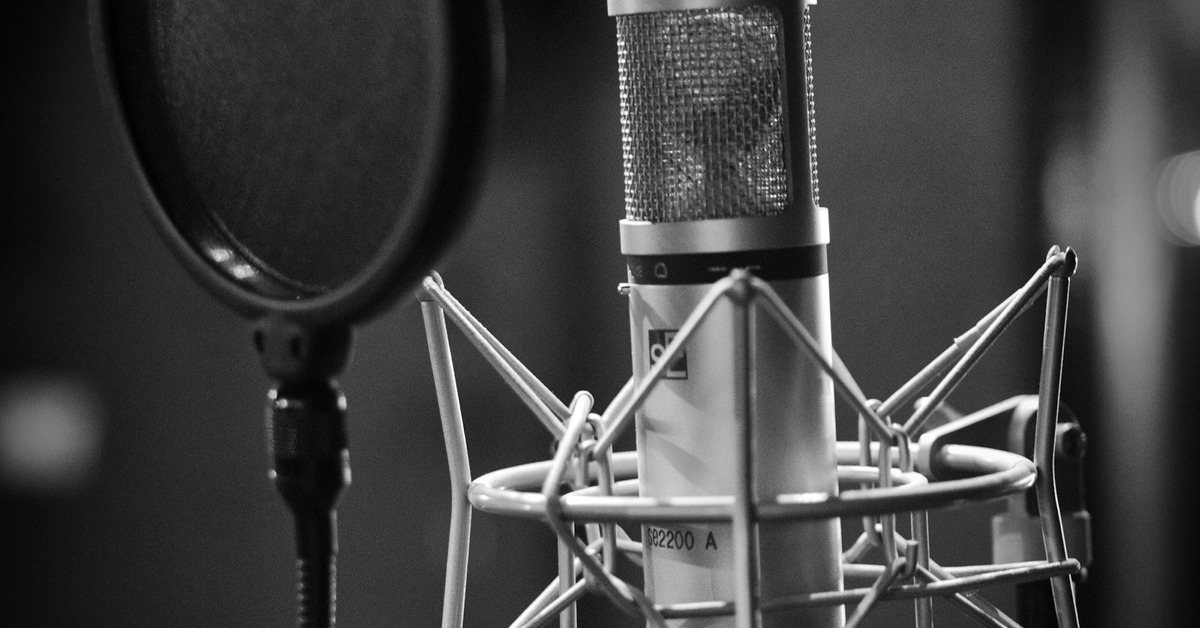
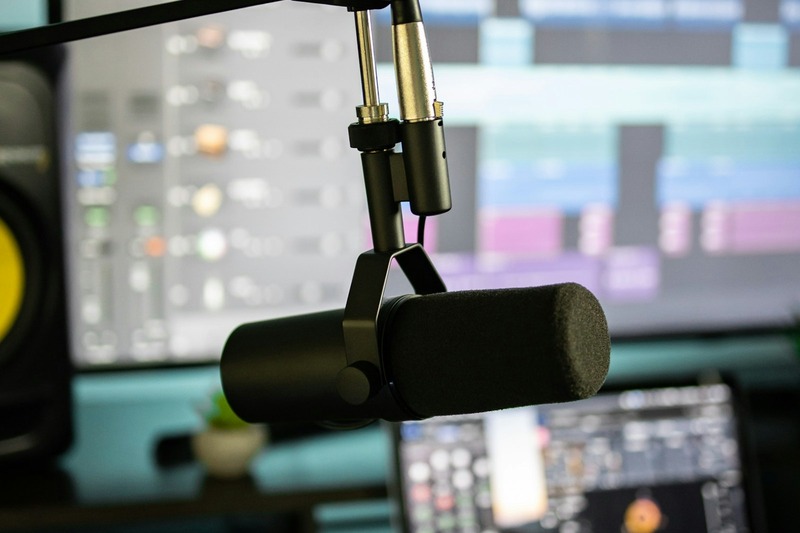
Your microphone choice depends on what you’re recording. A dynamic microphone like the Shure SM57 or Sennheiser e835 is excellent for vocals, guitar amps, and podcasting. Dynamic mics are rugged, handle high sound pressure levels, and don’t require phantom power. They reject background noise better than condensers, making them ideal for untreated rooms.
A condenser microphone like the Audio-Technica AT2020 is better for capturing detail in acoustic guitar, softer vocals, and voiceover work. Condensers are more sensitive and pick up higher frequencies. They also need phantom power from your interface. The downside is they also pick up room noise, footsteps, and computer fans. Use them only if you can control your recording environment.
For a versatile starter, the Shure SM57 at around $100 is practically indestructible. It sounds great on vocals with a good preamp, works on guitar cabs, and even works as a snare mic for drums later. The AT2020 is around $130 and offers a brighter, more open sound that beginners often find more flattering on their voice.
You absolutely need a pop filter if you’re using a condenser mic. Even with a dynamic mic, one reduces plosives and sibilance that ruin takes. A simple clamp-on pop filter costs $10â$15. A mic stand is also essential. A boom arm saves desk space and lets you position the mic exactly. Spend $25â$40 on a solid desktop boom arm or a floor stand with a boom. A simple way to reduce plosives is to use a pop filter placed a few inches from the mic.
One thing to avoid: buying a condenser microphone without checking that your interface provides phantom power. Most modern interfaces do, but some budget models lack it. Also, don’t buy a large-diaphragm condenser for a noisy room. You’ll spend more time editing out hums and clicks than actually recording.
Headphones: Closed vs. Open Back
At this budget, headphones will be your primary monitoring tool. There are two types: closed-back and open-back. Closed-back headphones isolate sound, keeping your recording mic from picking up headphone bleed. They’re essential for tracking vocals or acoustic instruments where you need to hear the click track or playback without the mic catching it.
Open-back headphones let sound pass through the ear cups. They create a more natural spatial image and are better for mixing because they reduce the in-ear pressure that distorts frequency perception. The tradeoff is they leak sound. Use them only for mixing, not for recording.
The Audio-Technica ATH-M50x is the standard recommendation for closed-back headphones at $150. They’re balanced, comfortable for long sessions, and fold up for storage. The Beyerdynamic DT 770 Pro ($130) is another solid closed-back option with better bass response and replaceable parts. Both are durable enough for daily use.
For open-back mixing headphones, the AKG K240 ($70) is a budget legend. They have a wide soundstage but lack sub-bass. The Sennheiser HD 560S ($150) is a step up with better bass extension and detail. If you can only buy one pair, start with closed-back for tracking. You can always add open-backs later for mixing.
Skipping monitors entirely at this budget isn’t a compromiseâit’s a deliberate strategy. Even entry-level monitors like the JBL 305P MkII require careful placement, room treatment, and volume matching. Headphones eliminate all that complexity and let you focus on recording quality instead of room acoustics.
Studio Monitors: When and If You Should Splurge
I advised skipping monitors earlier, but let me clarify when you might consider them. If your budget allows a stretch beyond $1000 or you already own headphones and a microphone, the JBL 305P MkII pair at around $300 is the best value in entry-level monitors. They have decent bass extension and a waveguide that improves stereo imaging.
The problem is room acoustics. Even a $1000 pair of monitors sounds terrible in an untreated room. Low frequencies bounce and cancel, midrange gets muddy, and high frequencies reflect off walls. You need absorption panels, bass traps, and diffusers to make monitors useful. That adds $200â$500 minimum.
For most people on a $1000 budget, headphones are a better choice until you have the space and money for proper treatment. They also let you mix late at night without disturbing anyone. The tradeoff is ear fatigue. You can’t mix for six hours straight on headphones without your ears getting tired. Take breaks every hour.
If you absolutely want monitors, consider the entry-level option but understand the limitations. The JBL 305P MkII or the Kali Audio LP-6 (around $200 each) are solid. Reserve $300 from your budget for the pair and accept that your mixing accuracy will be limited without treatment. It’s better than nothing but far from ideal.
The DAW: Free vs. Paid Software
Your Digital Audio Workstation (DAW) is the software that records, edits, and mixes your audio. You don’t need to spend money on a DAW at this budget. Free options are surprisingly capable. Audacity is simple and perfect for podcast editing, voiceovers, and basic recording. It lacks MIDI support and advanced mixing features but gets the job done.
Cakewalk by BandLab is a full-featured DAW with multitrack recording, MIDI editing, and built-in effects. It used to be a paid product and is now free. It works on Windows only. For macOS, GarageBand is included free and offers everything a beginner needs for recording and mixing instruments and vocals.
Paid options like Ableton Live Lite (often free with hardware purchases) or FL Studio ($99 for the basic version) offer more workflow flexibility and better tools for electronic music production. The subscription model of software like Pro Tools ($24/month) isn’t cost-effective at this budget. Avoid subscriptions unless you have a specific need.
The choice of DAW is mostly personal preference. Start with a free one and learn the fundamentals. Upgrading later is easy. The DAW itself doesn’t affect sound qualityâyour interface and microphone do that. Don’t spend $200 on a DAW when that money could buy a better microphone or interface.
Cables, Stands, and Accessories: The Hidden Costs
Here’s where budgets get blown. A quality XLR cable costs $15â$25 for a 10-foot or 15-foot length. Don’t buy the $6 cable on Amazon. Cheap cables have thin shielding that picks up electrical interference from power lines, monitors, and even lighting. That noise becomes part of your recordings. Spend the extra $10 now to avoid frustration later. A reliable XLR cable with proper shielding is worth the investment.
You need at least two XLR cables if you plan to record two microphones, but one is fine to start. Mogami Gold, Pro Co, and Neutrik connectors are industry standards. For a budget, look for cables with braided shielding and metal connectors. The Amazon Basics XLR cable is actually decent for the price.
A mic stand is another item where spending $30â$40 beats buying a $15 stand that tips over. A round-base tripod stand is stable for floor use. A desktop boom arm saves space if you’re at a desk. Avoid the clamp-on mini stands that can’t support a heavy mic. They wobble and cause handling noise.
Pop filters are essential for vocal recording. The nylon mesh type for $10â$15 works fine. Metal mesh pop filters last longer but cost more. A reflection filter for $50â$70 can help reduce room reflections if you can’t treat your space. They attach to your mic stand and block sound coming from behind the mic. Not perfect but helpful in small rooms.
Mistakes to avoid: buying a bundle that includes a mic, interface, and cables for $150. These bundles use the cheapest possible components. The microphone will be noisy, the interface will have poor preamps, and the cables will fail within months. Spend your money on individual quality items instead.
Acoustic Treatment on a Budget
Soundproofing and acoustic treatment are not the same thing. Soundproofing stops sound from leaving your room. That’s expensive and requires mass-loaded vinyl, double drywall, and construction work. Don’t attempt it on a $1000 budget. Acoustic treatment controls reflections within your room. That’s doable.
The most effective cheap treatment is a moving blanket or heavy curtain placed over a mic stand behind your recording position. This absorbs high-frequency reflections that cause a boxy sound. A thick comforter draped over a chair does the same thing for under $20. It’s ugly but functional.
Foam panels ($20â$40 for a pack of 12) help at reflection points: the wall directly in front of you and the wall behind your listening position. Don’t cover all four walls with foam. That kills the high end and leaves low frequencies uncontrolled. Focus on the first reflection points: the spot on each wall where a mirror shows the speaker or the singer.
A simple feedback reduction approach is to record in the center of a room away from walls. That reduces comb filtering from early reflections. Also, avoid recording in a closet full of soft materials unless you want a dead, lifeless sound. The goal is balanced absorption, not total deadening.
Acoustic treatment improves headphone mixing accuracy because it reduces the false stereo image created by room reflections. Even with headphones, treating the room helps if you ever use monitors. Start with a simple blanket and one pack of foam panels. That’s enough for noticeable improvement.
Sample Budget Breakdown: One $1000 Setup
Here’s a concrete gear list that fits within your $1000 budget. Prices are estimates and can vary based on sales and availability. Check current Amazon prices before purchasing.
- Audio Interface: Focusrite Scarlett 2i2 (3rd Gen) â $170
- Microphone: Shure SM57 â $100
- Pop Filter: Aokeo clamp-on pop filter â $12
- Mic Stand: Gator Frameworks tripod boom stand â $40
- Headphones: Audio-Technica ATH-M50x â $150
- XLR Cable: Mogami Gold 10-foot â $25
- Reflection Filter: SE Electronics Reflexion Filter small â $70
- Foam Panels: 12-pack wedge foam â $30
- DAW: Cakewalk by BandLab (free) or Audacity (free)
Total: $597 â you have $403 remaining. Spend that on an extra microphone like the Audio-Technica AT2020 ($130) for acoustic instruments, a second XLR cable ($25), a boom arm for your desk ($30), and a decent set of open-back headphones like the AKG K240 ($70) for mixing. That leaves around $150 for incidentals and future upgrades.
This setup covers vocals, acoustic guitar, electric guitar via amp, podcasting, and basic mixing. You can record one track at a time with the SM57 and use the AT2020 for stereo recordings or voiceover. The open-back headphones let you mix without the closed-back seal that masks low-end detail.
Common Mistakes Beginners Make (and How to Avoid Them)
Mistake #1: Buying a cheap microphone. The $30 USB microphone that comes with a stand and cable seems like a good deal. It’s not. The sound quality is thin, the preamp is noisy, and there’s no way to upgrade components later. A $100 dynamic mic through a proper interface will sound monumentally better.
Mistake #2: Ignoring cable quality. A bad XLR cable introduces hum, hiss, and intermittent dropouts. You’ll spend hours troubleshooting what turns out to be a $6 cable. Buy a decent brand and test it immediately. If you hear noise, return it.
Mistake #3: Not checking DAW compatibility. Some interfaces have driver issues with certain DAWs, especially on Windows. Check the manufacturer website for compatibility lists before buying. The Scarlett 2i2 is widely supported, but smaller brands might have issues with Reaper or FL Studio.
Mistake #4: Expecting studio-quality sound from an untreated room. Even with professional gear, your bedroom will always sound like a bedroom until you treat it. Accept that and focus on capturing a clean take rather than an amazing one. You can add reverb and EQ in post-production. You can’t fix a room reverb that ruins a vocal performance.
Mistake #5: Buying everything at once without research. Resist the urge to order a $500 bundle on Amazon. Buy each component individually after reading reviews and understanding its role in your chain. A single good interface and one good microphone outperform five mediocre pieces of gear.
When to Upgrade: Signs Your Setup is Holding You Back
Don’t rush to upgrade unless your current gear is genuinely limiting your creativity or sound quality. Here’s how to tell when it’s time.
You can’t hear detail in your mixes. If your headphones are old or entry-level, you might be missing sub-bass frequencies or harsh high midrange. The ATH-M50x are good, but if you start mixing professionally, an open-back headphone like the Sennheiser HD 6XX ($200) offers better detail. Upgrade headphones first when mixing becomes your bottleneck.
You need to record more than two microphones. If you’re recording a band or multiple podcast guests, a two-input interface holds you back. Upgrade to a four-input interface like the Focusrite Scarlett 4i4 ($300) or a used Behringer UMC404HD ($150). The UMC404HD has decent preamps but less driver stability. Weigh the cost against the need.
Your microphone can’t handle loud sources. The SM57 handles guitar amps and drums well. If you record vocals and find the sound thin, consider a condenser like the Rode NT1 ($150) or a large-diaphragm dynamic like the Shure SM7B ($300). The SM7B is expensive but worth it for radio-style podcasts and vocals. Wait until your SM57 feels limited.
Room treatment is inadequate. If your recordings still sound boxy or have excessive reverb, you need more absorption. Upgrade from moving blankets to proper bass traps and diffusers. This is the least glamorous upgrade but the most impactful for sound quality. Don’t upgrade microphones until the room is treated.
Final Verdict: Is $1000 Enough for a Home Studio?
Yes, $1000 is enough to build a functional, reliable home recording studio for demos, podcasts, indie music, and voiceover work. The setup described here covers the essentials: a clean interface, a versatile microphone, decent monitoring, and basic acoustic treatment. It won’t compete with a professional studio, but it doesn’t need to. You’ll capture usable tracks that you can share, publish, or refine.
The key is spending intentionally. Put money into the interface and microphone first. Use free software and affordable cables. Treat your room as best you can with cheap materials. Accept that headphones are your monitoring solution until you can afford proper monitors and treatment. Upgrade components one at a time as your skills and needs grow.
The important thing is to start recording. Perfect gear now beats perfect gear never.